02 - Setup Python Environment
Before running any scripts, you need a Python environment with the required packages. This section guides you through installing Miniconda, creating a dedicated conda environment, and verifying your setup.
Why Virtual Environments?
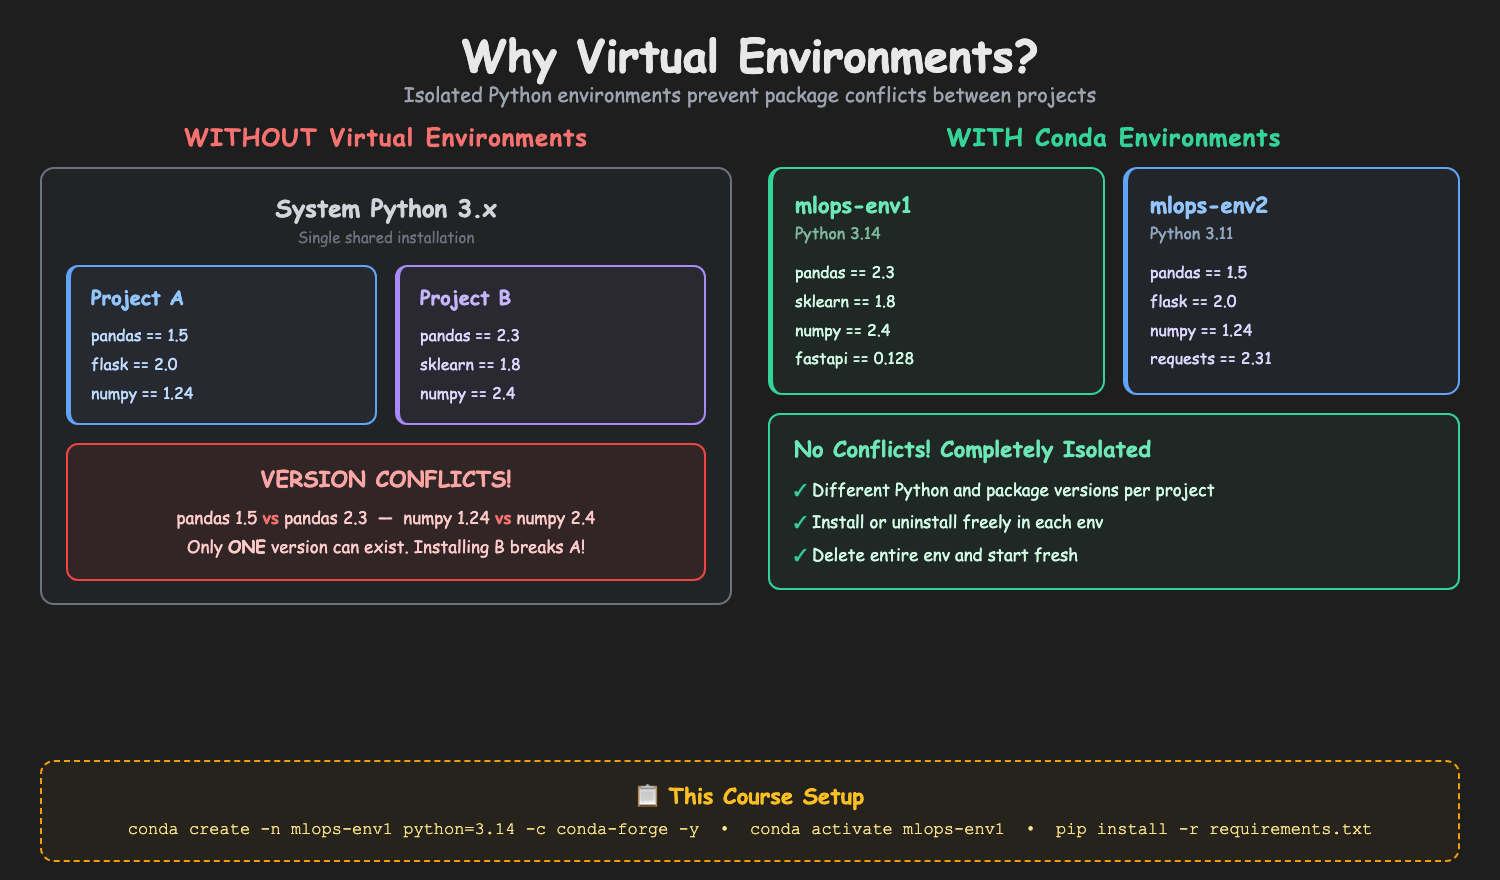
Table of Contents
| Step | Topic |
|---|---|
| Step-01 | Install Miniconda |
| Step-02 | Create Conda Environment |
| Step-03 | Install Dependencies |
| Step-04 | Verify Installation |
Step-01: Install Miniconda
Download Miniconda from: https://docs.anaconda.com/miniconda/
Step-01-01: macOS
# Option 1: Download from the website
# Go to https://docs.anaconda.com/miniconda/ and download the macOS installer

# Option 2: Use Homebrew
brew install --cask miniconda

# After installation, initialize conda for your shell
# Check which shell you are using
echo $SHELL

# If /bin/zsh (default on macOS)
conda init zsh

# If /bin/bash
conda init bash

# Restart your terminal after running this
Step-01-02: Windows
- Download the Windows installer (.exe)
- Run the installer
- Check "Add Miniconda to my PATH environment variable" during installation
- Open Command Prompt or PowerShell
Verify Installation (both platforms)
Expected Output:
Accept Terms of Service (both platforms, one-time)
conda tos accept --override-channels --channel https://repo.anaconda.com/pkgs/main
conda tos accept --override-channels --channel https://repo.anaconda.com/pkgs/r
Note: This is required once after a fresh Miniconda install. Without it,
conda createwill fail with a Terms of Service error.
Step-02: Create Conda Environment
# Create environment with Python 3.14
conda create -n mlops-env1 python=3.14 -c conda-forge -y

# Activate environment
conda activate mlops-env1
Expected Output:
Step-03: Install Dependencies
# Navigate to the project folder
cd 02_Setup_Python/ccfd-project

# Install from requirements file
pip install -r requirements.txt
Alternative: If you're using the shared folder, run from
ccfd-project-main/instead. See Shared Project Folder in the root README.
Key packages installed:
| Package | Version | Purpose |
|---|---|---|
| scikit-learn | 1.8.0 | ML algorithms, pipelines |
| pandas | 2.3.3 | Data manipulation |
| numpy | 2.4.1 | Numerical operations |
| matplotlib | 3.10.8 | Visualizations |
| seaborn | 0.13.2 | Statistical plots |
| fastapi | 0.128.0 | Inference API |
| uvicorn | 0.40.0 | API server |
Note: Exact pinned versions are in
requirements.txtfor reproducibility.
Step-04: Verify Installation
python -c "import sklearn; import pandas; import numpy; print('All packages OK')"
python -c "import sklearn; print(f'sklearn version: {sklearn.__version__}')"
Expected Output:
Environment Commands Reference
| Command | Purpose |
|---|---|
conda activate mlops-env1 | Activate environment |
conda deactivate | Deactivate environment |
conda env list | List all environments |
conda env remove -n mlops-env1 | Delete environment |
Troubleshooting
"conda: command not found" (macOS) - Restart your terminal after Miniconda installation - Run: conda init zsh and conda init bash, then restart terminal - Or manually: source ~/.zshrc
"conda is not recognized" (Windows) - Restart Command Prompt/PowerShell after installation - If still not found, Miniconda was not added to PATH during installation - Fix: Reinstall and check "Add Miniconda to my PATH environment variable"
Package conflicts (both platforms)
# Remove and recreate environment
conda env remove -n mlops-env1
conda create -n mlops-env1 python=3.14 -c conda-forge -y
conda activate mlops-env1
pip install -r requirements.txt
Next Steps
| Next | Topic | What You'll Do |
|---|---|---|
| 03_Generate_Dataset | Synthetic Data | Generate 10,000 credit card transactions with realistic fraud patterns |
Prefer to learn by watching?
The video course builds this whole project with you on screen, step by step.