Machine Learning End-to-End: Credit Card Fraud Detection
Build a real fraud model in Python: EDA, feature engineering, training, tuning & your own FastAPI inference API.
Taught by Kalyan Reddy Daida, StackSimplify.
Get the Video Course Start reading
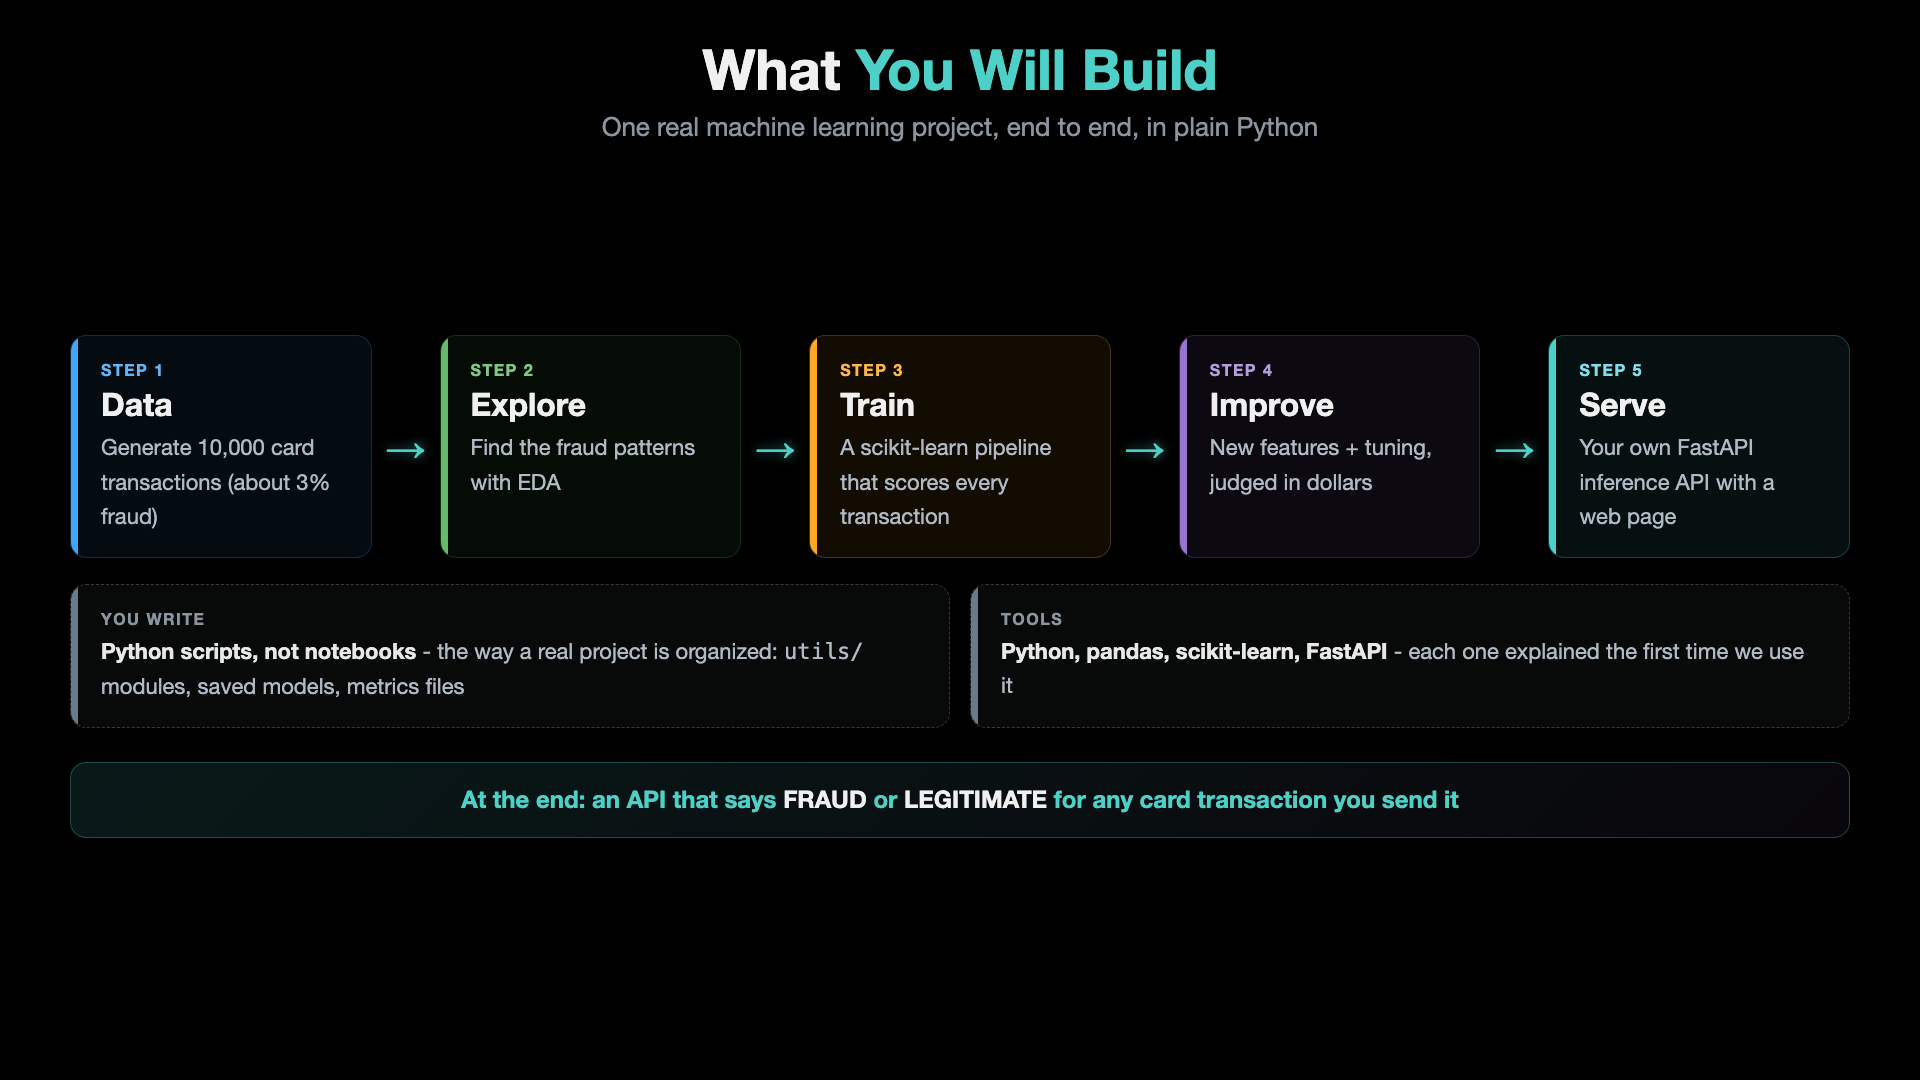
This is the code companion for the course. You build one complete machine learning project, a credit card fraud detector, from raw data to your own prediction API. It is written as plain Python scripts, not notebooks, organized the way real projects are. Every model is judged in dollars saved for the bank, not only by accuracy.
The Course in Pictures
What you build
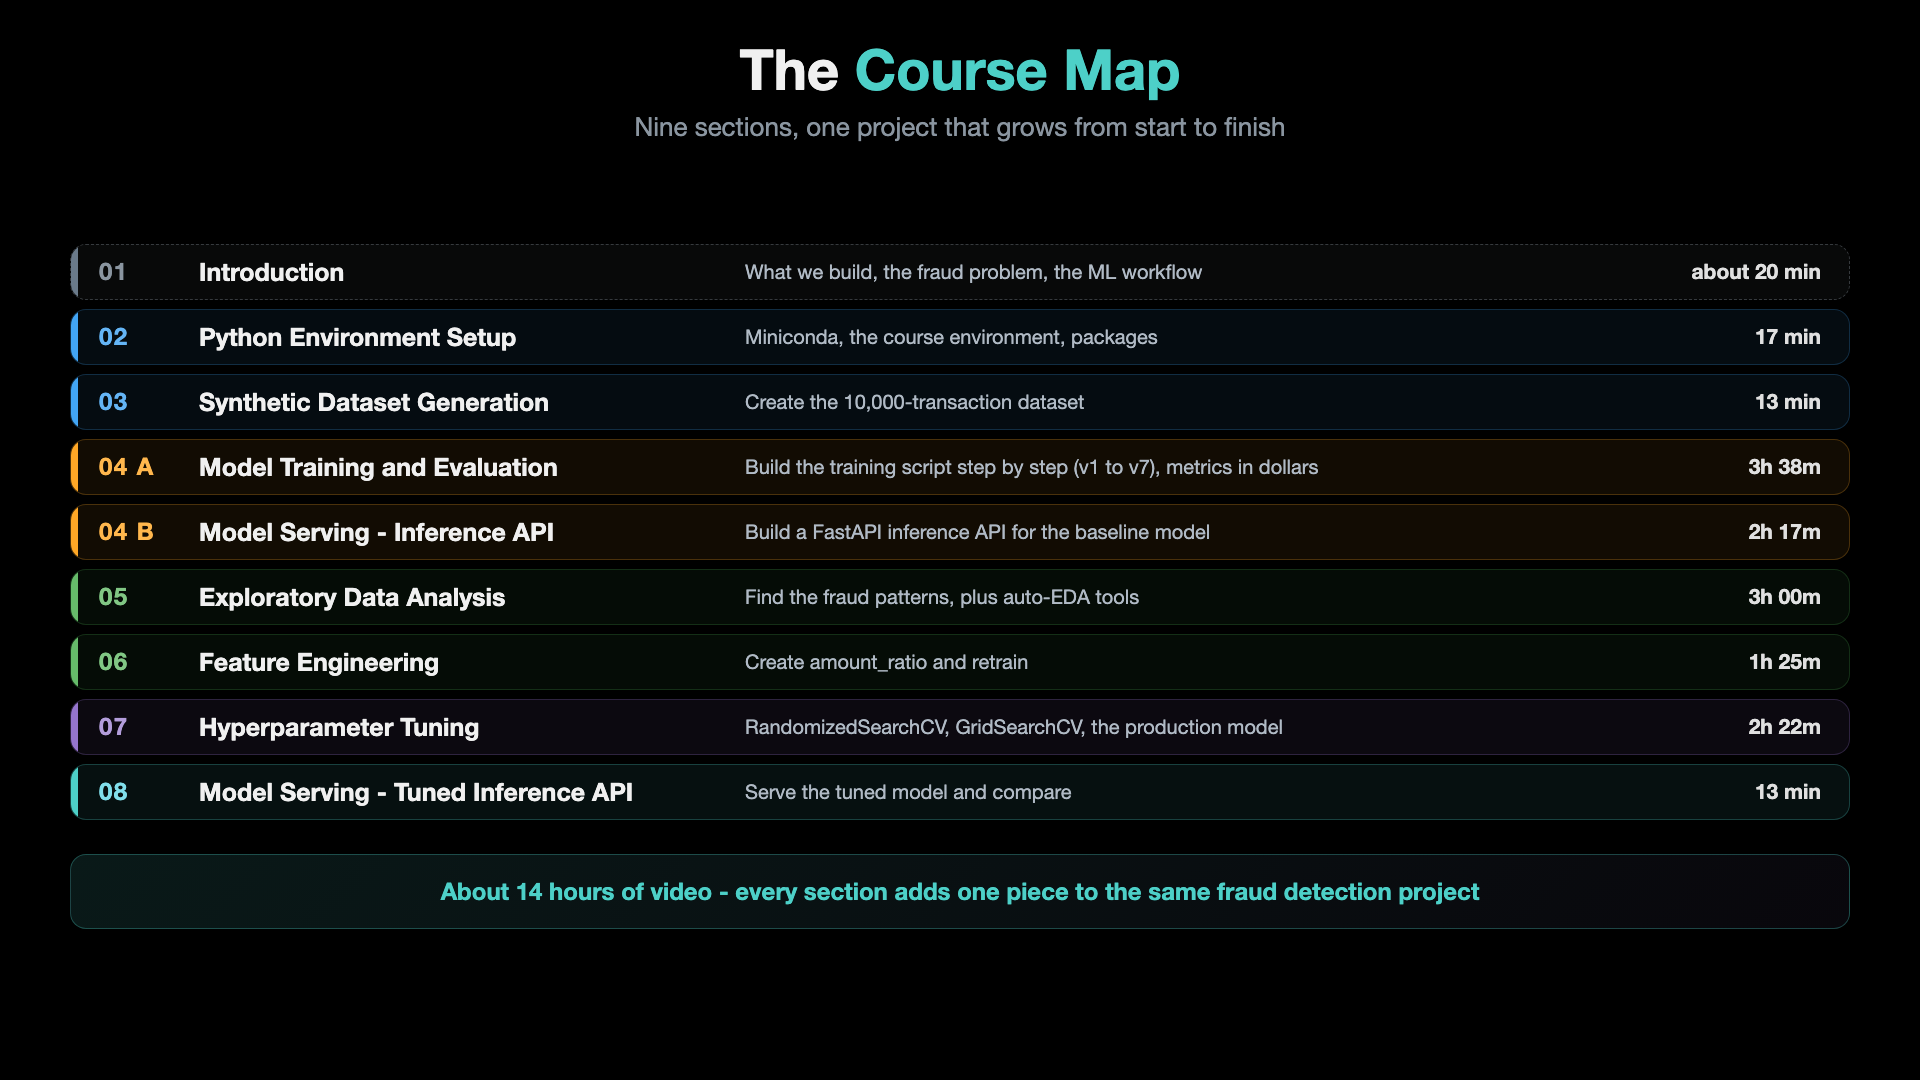
What you learn, and in what order
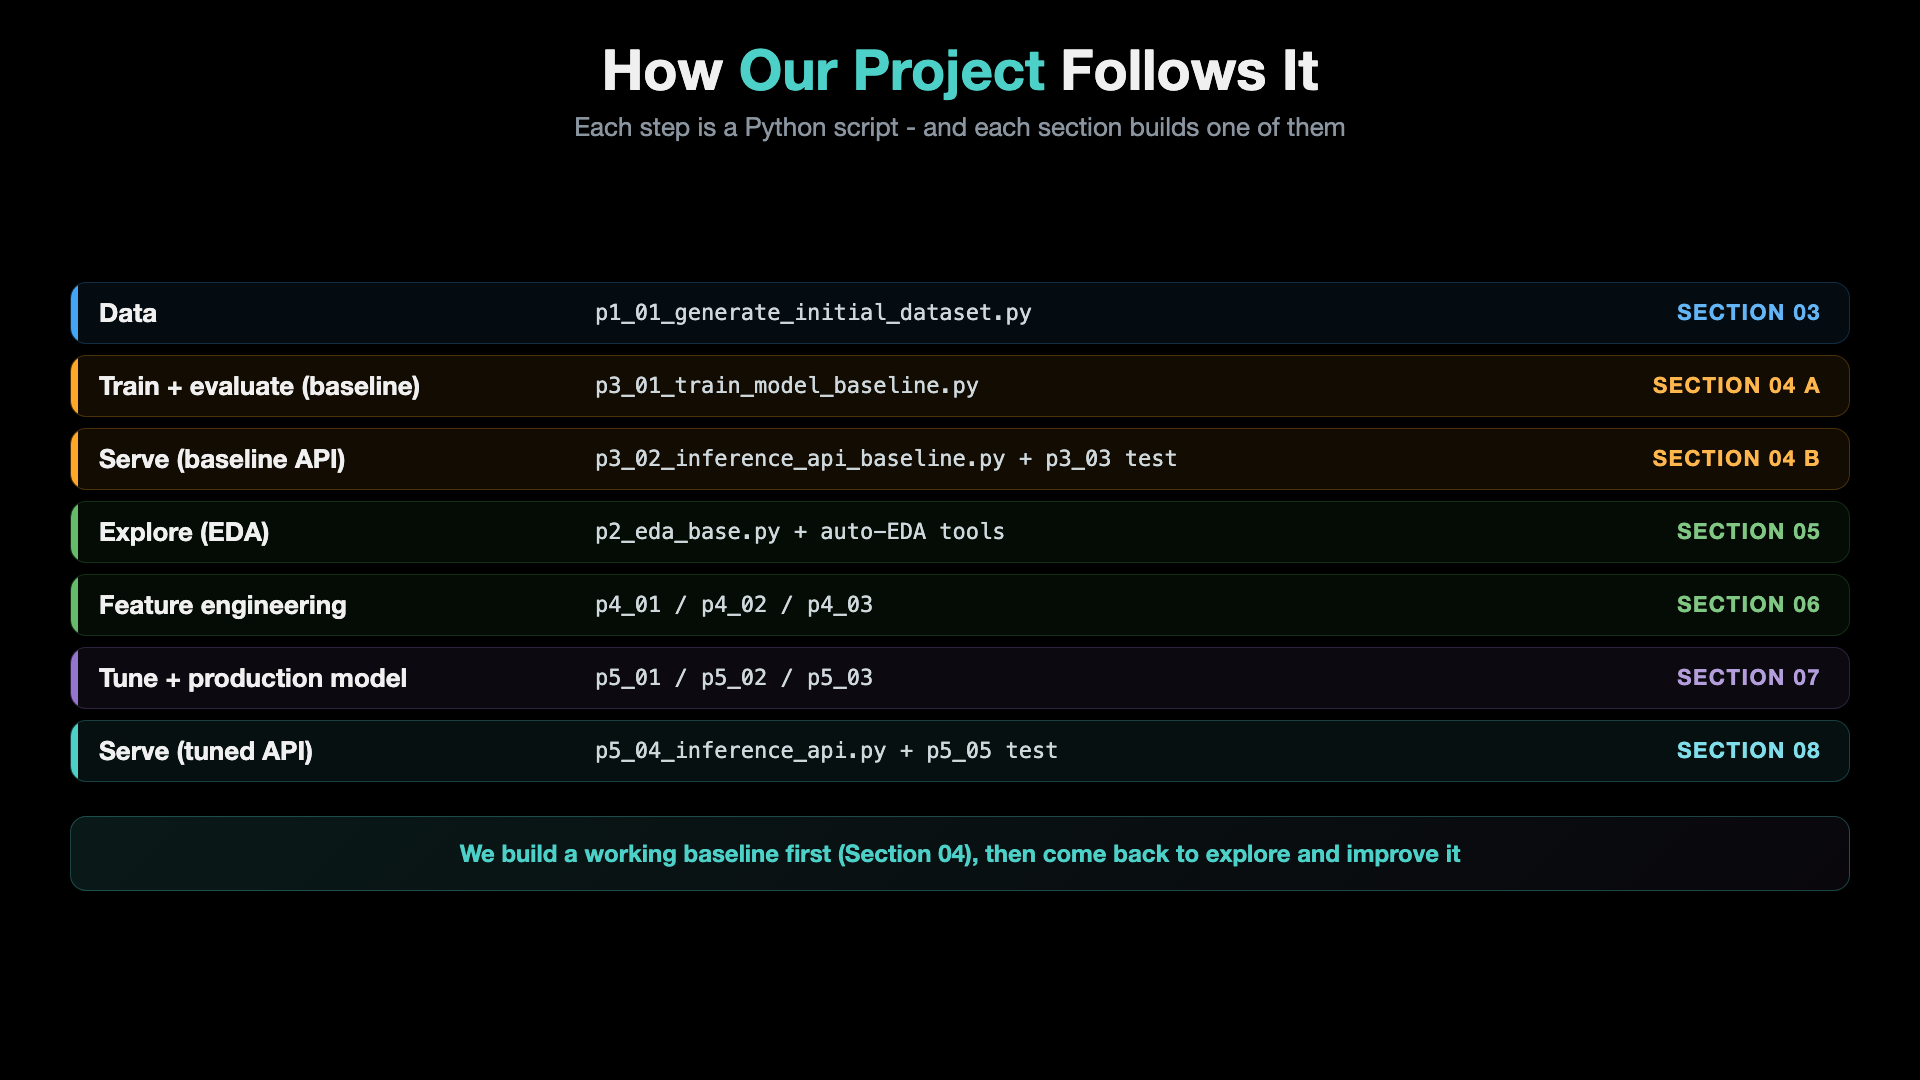
How the project follows the machine learning workflow
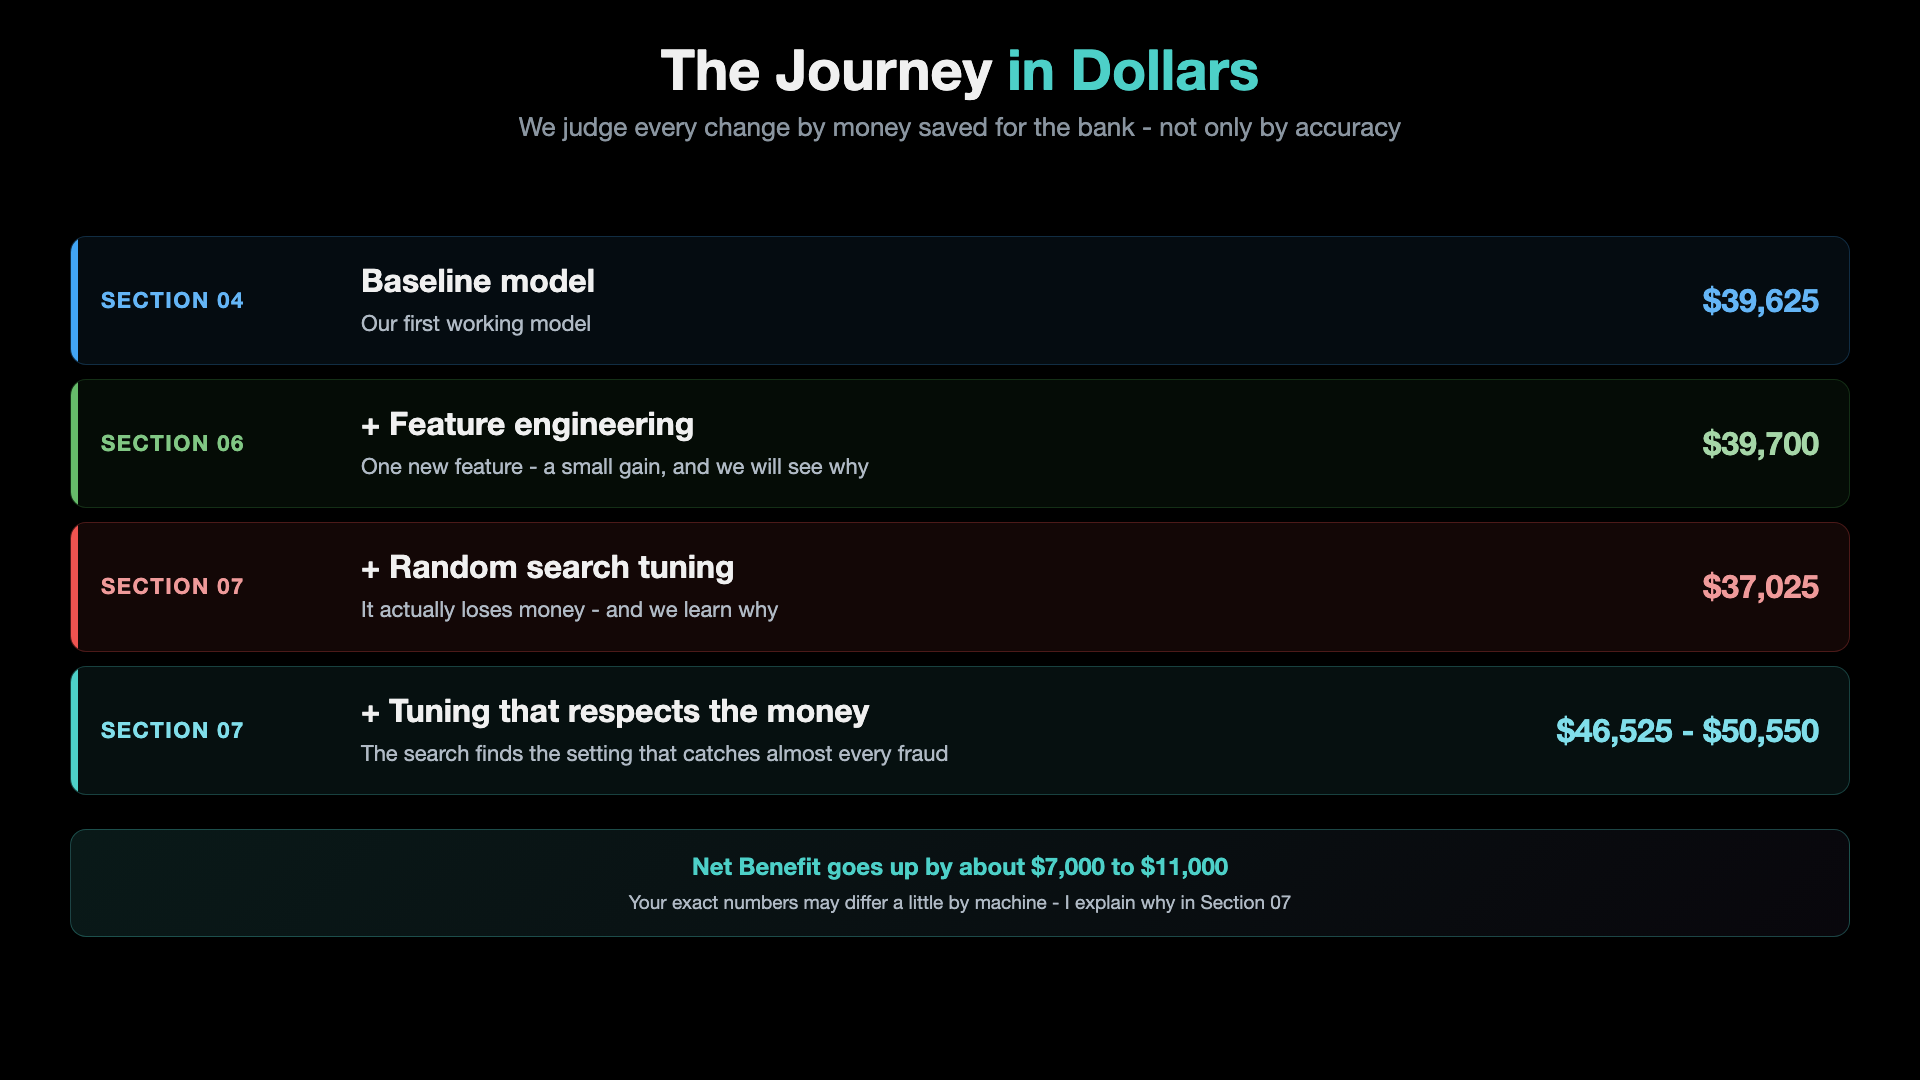
The journey in dollars
What You Will Learn
| Section | What you learn | Video |
|---|---|---|
| 01. Introduction | What you build, the fraud problem in dollars, the machine learning workflow | about 20 min |
| 02. Python Environment Setup | Miniconda, the course environment, installing the packages | 17 min |
| 03. Synthetic Dataset Generation | Generate 10,000 card transactions (about 3% fraud) | 13 min |
| 04 A. Model Training and Evaluation | Build the training script step by step (v1 to v7): split, scikit-learn pipeline, metrics, Net Benefit, saving the model | 3h 38m |
| 04 B. Model Serving - Inference API | Build a FastAPI inference API with validation, a health check and a web page | 2h 17m |
| 05. Exploratory Data Analysis | Find the fraud patterns with plots, plus two auto-EDA tools | 3h 00m |
| 06. Feature Engineering | Create amount_ratio, analyze it and retrain | 1h 25m |
| 07. Hyperparameter Tuning | RandomizedSearchCV, GridSearchCV over class_weight, a YAML handoff and the production model | 2h 22m |
| 08. Model Serving - Tuned Inference API | Serve the tuned model and compare it with the baseline | 13 min |
About 14 hours of video. Every section adds one piece to the same fraud detection project.
What You Build
Data (p1_01) -> EDA (p2) -> Train baseline (p3_01) -> Serve baseline API (p3_02, port 8000)
            -> Feature engineering (p4_01..p4_03) -> Tune (p5_01, p5_02) -> Production model (p5_03)
            -> Serve tuned API (p5_04, port 8001)
At the end you have two FastAPI inference APIs running on your own machine. Each has /inference, /health, /docs and a /ui web page, and each says FRAUD or LEGITIMATE for any card transaction you send it.
Results - baseline vs tuned
| Baseline (Section 04) | Tuned (Sections 07 and 08) | |
|---|---|---|
| Model | LogisticRegression, class_weight='balanced' | LogisticRegression, class_weight={0:1, 1:100} |
| Features | 8 | 9 (+ amount_ratio) |
| Decision threshold | 0.5 | 0.5 |
| Frauds caught (of 60 in the test set) | 46 (recall 77%) | 57 (recall 95%) |
| False alarms (of 1,940 honest transactions) | 289 | 1,161 |
| Net Benefit | $39,625 | $50,550 |
The improvement journey:
| Stage | Net Benefit | Change |
|---|---|---|
| Baseline (p3_01) | $39,625 | - |
| + Feature engineering (p4_03) | $39,700 | +$75 |
| + Random search, narrow grid (p5_01) | $37,025 | -$2,675 |
+ GridSearchCV over money-weighted class_weight (p5_02 -> p5_03) | $50,550 | +$10,925 vs baseline |
Your numbers may differ. These numbers come from an Apple Silicon Mac. They were reproduced exactly on an Apple M5 on 2026-09-29. Most of the videos were recorded on an Intel Mac, where the same tuning picks
class_weight={0:1, 1:200}and shows $46,525. Your own results depend on your processor and its math library. Section 07 explains why.
How Net Benefit is calculated
Net Benefit = (Fraud Caught x $1,475) - (False Alarms x $25) - (Fraud Missed x $1,500)

Baseline:  (46 x $1,475) - (  289 x $25) - (14 x $1,500) = $39,625
Tuned:     (57 x $1,475) - (1,161 x $25) - ( 3 x $1,500) = $50,550
Our formula counts +$1,475 for a caught fraud and -$1,500 for a missed one. So one extra catch moves the score by about $3,000, which is like saying a missed fraud costs the bank about $3,000 all-in (the stolen money plus fees, checks and lost customers). That is why the tuned model prefers to flag many transactions: it catches 57 of 60 frauds, but it also flags 1,161 honest ones. This is a learning project, not a model to deploy as-is in a bank.
What Is in This Repo
- One folder per section (
01_...to08_...). Each has a README that teaches the section, and from Section 03 on its ownccfd-project/folder with every script that section needs, so you can jump into any section on its own. 04_Model_Training_and_Inference/04_01_Train_Baseline_Model/v1_...tov7_...: the training script at each build step. Use them as answer keys while you build along.07_Hyperparameter_Tuning/code-walkthroughs/: side-by-side copies of the scripts, to see exactly what changed from one step to the next.ccfd-project-main/: an optional shared folder (see Shared Project Folder (Alternative)).images/: the diagrams used in the READMEs.
Data does not carry over between sections. Inside each section's ccfd-project/, generate the data first (p1_01_generate_initial_dataset.py), then run that section's scripts.
Shared Project Folder (Alternative)
Optional. Instead of the per-section folders, you can use ccfd-project-main/ at the repo root: copy each section's scripts into it as you go, and everything runs from one place with shared data and models.
| Approach | Folder | Best for |
|---|---|---|
| Per-section | 03_Generate_Dataset/ccfd-project/ etc. | Jumping to any section, self-contained |
| Shared main | ccfd-project-main/ | Following the course in order, one data and models location |
Quick Start
Run every block below from the repo root (the folder you cloned). Open a new terminal, or cd back to the root, before the next block.
1. Set up the environment (once)
conda create -n mlops-env1 python=3.14 pip -c conda-forge -y
conda activate mlops-env1
pip install -r ccfd-project-main/requirements.txt
The video in Section 02 shows the same command without pip. Adding pip makes sure the new environment has its own pip. If pip is ever missing, run conda install pip inside the environment.
2. Generate the data
Expected: 10,000 transactions with a fraud rate of 2.98%, saved as a CSV in data/.
3. Train the baseline model
cd 04_Model_Training_and_Inference/04_01_Train_Baseline_Model/ccfd-project
python p1_01_generate_initial_dataset.py
python p3_01_train_model_baseline.py
Expected: Net Benefit: $39,625, and the model in models/p3_01_baseline/.
4. Start the baseline API (terminal 1) and test it (terminal 2)
cd 04_Model_Training_and_Inference/04_02_Inference_API/ccfd-project
python p1_01_generate_initial_dataset.py
python p3_01_train_model_baseline.py
python p3_02_inference_api_baseline.py
cd 04_Model_Training_and_Inference/04_02_Inference_API/ccfd-project
python p3_03_inference_test_baseline.py
Expected: the API starts on port 8000 (Starting Fraud Detection API (P3_01 Baseline)...), and the test prints Tests passed: 3/3. Web page: http://127.0.0.1:8000/ui
5. Explore the data
cd 05_EDA_and_Preprocessing/ccfd-project
python p1_01_generate_initial_dataset.py
python p2_eda_base.py
Expected: 6 plots saved in eda_plots/.
6. Feature engineering
cd 06_Feature_Engineering/ccfd-project
python p1_01_generate_initial_dataset.py
python p4_01_feature_engineering_fe1.py
python p4_03_train_model_with_fe1.py
Expected: Net Benefit: $39,700.
7. Hyperparameter tuning and the production model
cd 07_Hyperparameter_Tuning/ccfd-project
python p1_01_generate_initial_dataset.py
python p4_01_feature_engineering_fe1.py
python p5_02_class_weight_gridsearch.py
python p5_03_train_production_model.py
Expected: the best config saved to artifacts/p5_02_best_config.yaml, and the production model with Net Benefit: $50,550 (on Apple Silicon; see the note above).
8. The tuned API
cd 08_Tuned_Inference_API/ccfd-project
python p1_01_generate_initial_dataset.py
python p4_01_feature_engineering_fe1.py
python p5_02_class_weight_gridsearch.py
python p5_03_train_production_model.py
python p5_04_inference_api.py
Expected: the tuned API on port 8001. Web page: http://127.0.0.1:8001/ui. In a second terminal (same folder), python p5_05_inference_test.py sends 3 test transactions.
Key Facts
| Python | 3.14 (conda environment mlops-env1) |
| Main libraries | pandas, NumPy, scikit-learn 1.8, FastAPI, pydantic, uvicorn (versions pinned in requirements.txt) |
| Dataset | 10,000 synthetic transactions, 298 fraud (2.98%) |
| Features | 8 base + 1 engineered (amount_ratio) |
| Model | LogisticRegression in a scikit-learn Pipeline |
| APIs | Baseline on port 8000, tuned on port 8001 |
Requirements
- Python basics: functions, lists, dictionaries and simple classes. New to Python? Take our Python for Absolute Beginners course first.
- No machine learning experience needed. Everything is explained as we go.
- A computer (Mac, Windows or Linux) that can run Miniconda and VS Code.
- An internet connection to install the packages.
Who This Course Is For
- DevOps, SRE and cloud engineers moving into machine learning.
- Developers and students who want one real machine learning project, end to end.
- Python learners ready for their first machine learning project.
Good to know: the data is synthetic (we generate it ourselves, so every pattern is clear and safe to share), and the API runs on your own machine. Containers and cloud deployment are not part of this course.
Troubleshooting
| Issue | Solution |
|---|---|
conda: command not found | Restart the terminal after installing Miniconda |
pip missing in the new environment | conda activate mlops-env1, then conda install pip |
No module named sklearn (or pandas) | Check that mlops-env1 is active, then pip install -r ccfd-project-main/requirements.txt |
| Package conflicts | conda env remove -n mlops-env1, then create it again |
| API does not start | The port may be in use. Mac / Linux: lsof -i :8000 (or :8001). Windows: netstat -ano \| findstr :8000 |
| Model file not found | Run the scripts in order inside the same section folder (p1 -> p3 -> p4 -> p5) |
| Test script cannot connect | Start the API first in another terminal |
(c) StackSimplify / Kalyan Reddy Daida. All rights reserved.